Bar-style LED grow lights are the best option for most growers right now, whether you're running a single 2x4 tent or stacking vertical shelves. They beat traditional panel boards on canopy coverage, heat spread, and uniformity, but only if you size them correctly and hang them at the right height. This guide cuts straight to what matters: which bars perform best, how to match them to your space, and how to avoid the common sizing and installation mistakes that kill yields. top led grow lights 2021
Best Bar LED Grow Lights: Buying Guide by Tent Size and PPFD
Marcus Rutherford
24 Mar 2026
What bar LED grow lights actually are (and where they work best)
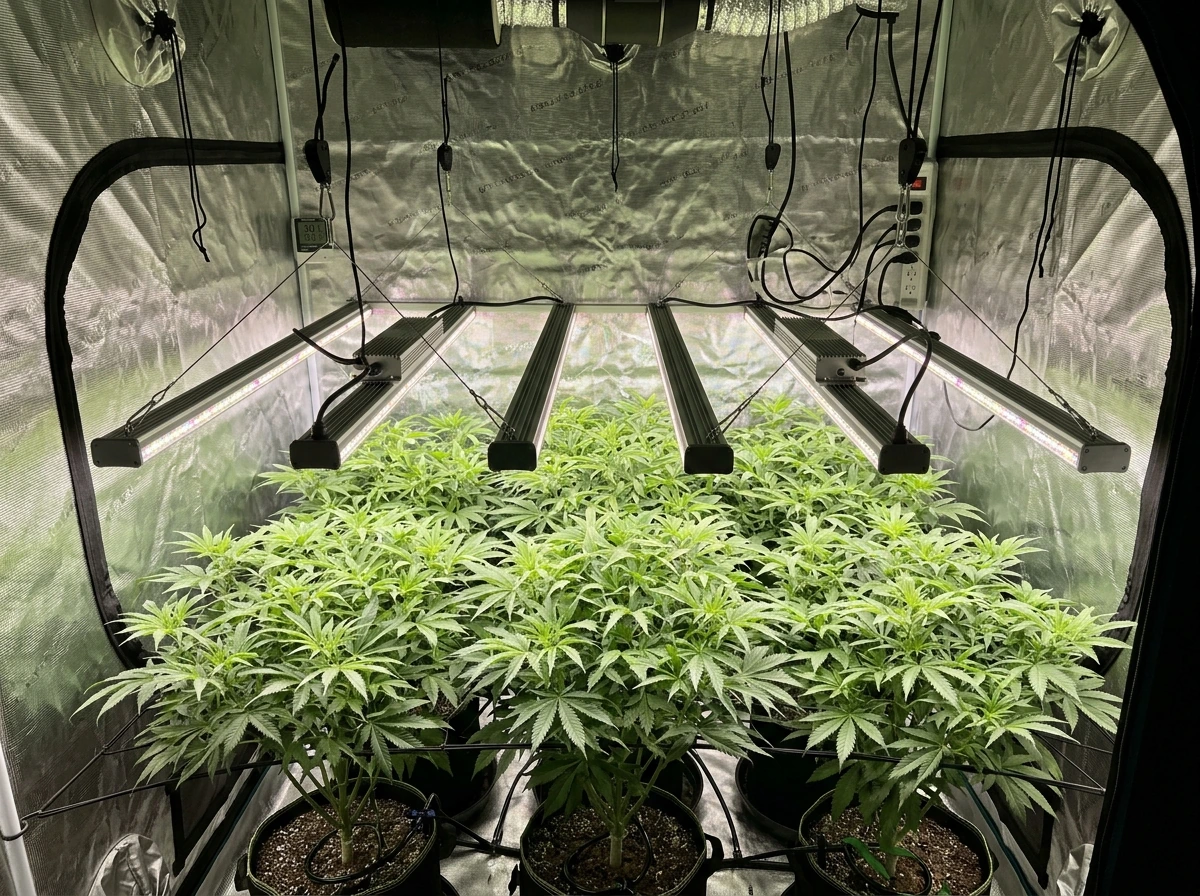
A bar-style LED grow light is a linear fixture, either a single elongated bar or a set of bars arranged in a rack or frame, rather than a square or rectangular panel board with densely packed diodes. The diodes are spread along the length of the bar, which gives you a wider, more even light footprint compared to a panel that fires most of its output from one dense point source. That spread is the main reason bar lights have taken over commercial cannabis and indoor vegetable operations over the past several years.
Coverage from a bar fixture depends on three things: the physical length of the bar, the beam angle or optics used on the diodes, and how you mount it (height and spacing relative to other bars). A single bar won't uniformly cover a 4x4 tent. You need either a multi-bar array or a fixture that holds several bars in a frame designed for that footprint. This distinction matters when you're shopping, because some products marketed as 'bar LED grow lights' are actually multi-bar fixtures with a frame, while others are individual bars meant to be daisy-chained or arrayed by the grower.
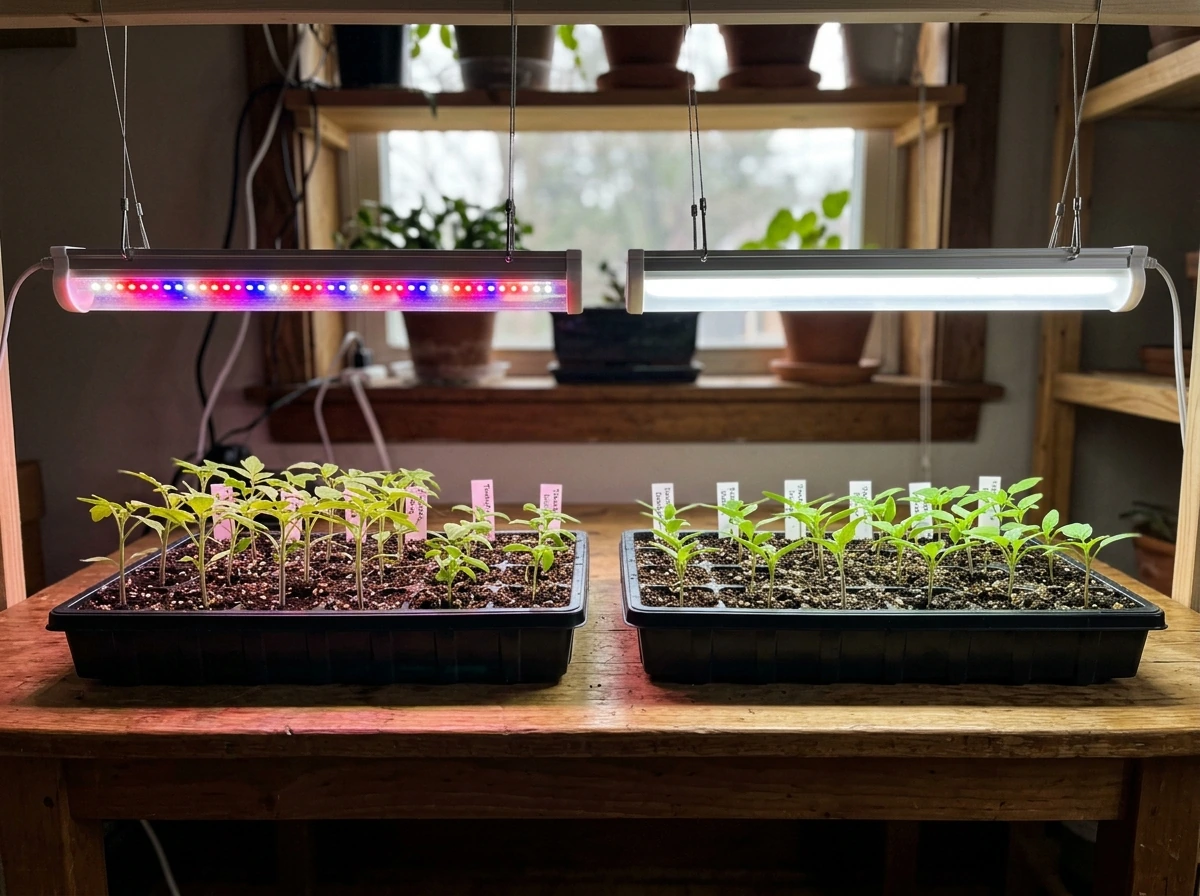
Bar lights genuinely shine in a few situations: large canopy coverage where uniform PPFD matters, vertical growing setups where you need side lighting between layers, propagation shelves where low-heat linear strips are ideal, and supplemental lighting along the sides of a tent. They're not always the right call for a single small pot under a solo fixture, but for most serious tent grows and any commercial layout, bars are hard to beat.
The specs that actually matter for performance
Marketing copy on bar light product pages can be misleading. Here are the numbers you should actually be looking at before you buy anything.
PPFD and the PAR map
PPFD (Photosynthetic Photon Flux Density, measured in µmol/m²/s) is the amount of usable light hitting your canopy per second. Any reputable bar light manufacturer will provide a PAR map, which is a grid of PPFD readings taken at a specific hanging height over a defined footprint. Always check what height the map was taken at. A light that claims 1,200 µmol/m²/s might be measured at 12 inches, and if you hang it at 24 inches (where it needs to be for heat management), the actual canopy PPFD will be substantially lower. The PPFD drop as you increase distance is significant: moving from 18 inches to 24 inches can reduce center PPFD by 25 to 35 percent depending on the optics. Look for PAR maps taken at 18 to 24 inches above the canopy, since that's the realistic range for most bar fixtures.
Efficacy: µmol/J is the efficiency number that counts
Efficacy (µmol/J) tells you how many micromoles of photosynthetically active light you get per joule of electricity consumed. Budget bar lights from a few years ago typically landed around 2.0 to 2.3 µmol/J. Current mid-tier bars like the Mars Hydro FC-E4800 claim 2.8 µmol/J using BridgeLux diodes, and the Spider Farmer SE-series lists PPE figures around 2.9 µmol/J for some models. Anything above 2.7 µmol/J is genuinely efficient by today's standards. Below 2.0 µmol/J means you're wasting real money on electricity, especially over a full grow cycle.
PPF: total light output of the fixture
PPF (Photosynthetic Photon Flux, measured in µmol/s) is the total light output of the fixture, not what hits the canopy but what the fixture emits in all directions. It lets you compare fixtures by raw output. A high-output commercial bar like the Grow Light Science PROGROW 2400 produces 2,424 µmol/s PPF and is designed to deliver around 1,500 µmol/m²/s PPFD at an 18-inch mounting height when arranged in an array. That's a serious flowering light. Veg-stage bars rarely need to exceed 600 to 900 µmol/s PPF for a standard 4x4 footprint.
Spectrum quality
Full-spectrum white LEDs with a red boost are the current standard for bars intended for flower and fruit production. The red wavelengths (620 to 700 nm) drive flowering and fruiting; blue (400 to 500 nm) handles vegetative structure and leaf density. Many bar fixtures now use a broad white spectrum supplemented with deep red diodes, which works well for most crops across both growth stages. Some bars still offer separate veg and bloom switches or channels, which gives you more control but adds complexity. For most growers running a single tent through both stages, a fixed full-spectrum bar with dimming is simpler and performs well.
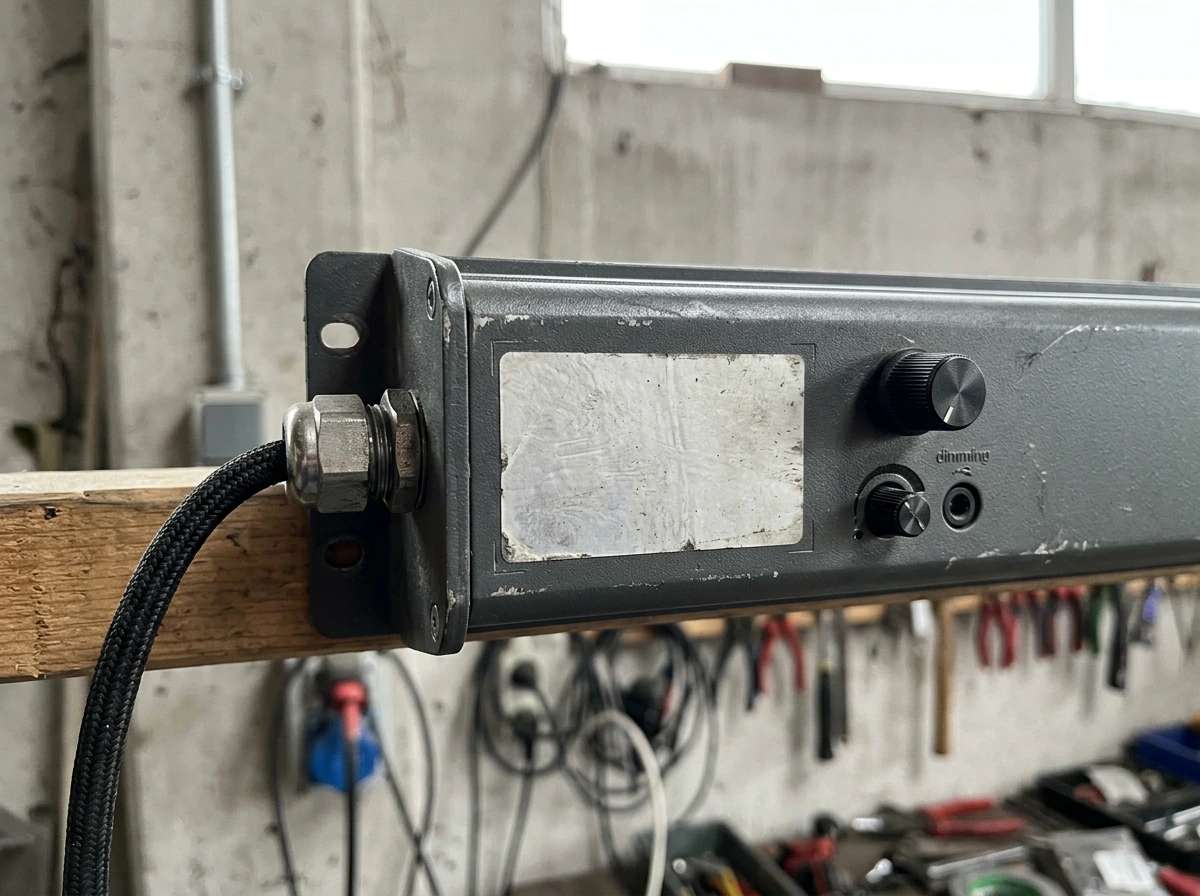
Driver quality and dimming
The driver is the power supply for the LEDs, and it's the component most likely to fail first. Look for fixtures using Meanwell or equivalent-grade drivers. Dimming capability matters: a good bar light should let you dial back intensity during early veg or propagation without simply switching off diodes (which degrades spectrum). Daisy-chain dimming, where one controller adjusts multiple bars simultaneously, is a huge practical advantage in multi-bar arrays. The Mars Hydro FC-E4800 and Spider Farmer SE-series both offer daisy-chain dimming, which makes scaling a commercial-style run much cleaner.
Safety certifications
UL 8800 is the key safety standard for horticultural lighting in the US. It's the first standardized framework specifically designed for grow lights, covering electrical safety, photobiological hazard assessment, and the humid/wet conditions typical in grow facilities. Under NEC Article 410, horticultural lighting equipment must be Listed, meaning it needs UL or ETL certification. The DLC (DesignLights Consortium) Horticultural QPL also requires UL 8800 compliance. If a bar light you're looking at doesn't carry an ETL or UL listing and specifically mentions UL 8800, that's a red flag, especially if you're running in a commercial setting or a space with high humidity. IP66 or IP65 ratings add another layer of protection in wet grow environments.
Sizing bar lights for your grow space
Getting the right number and size of bars for your footprint is where most growers go wrong. The goal is to hit your target PPFD uniformly across the entire canopy, not just in the center hot zone directly under each bar.
PPFD targets by growth stage
As a practical baseline: seedlings and clones want 100 to 300 µmol/m²/s; vegetative growth performs well at 400 to 600 µmol/m²/s; flowering and fruiting crops want 600 to 900 µmol/m²/s for most strains, and high-light crops like cannabis in peak flower can push 900 to 1,500 µmol/m²/s with CO2 supplementation. Without CO2, pushing above 1,000 µmol/m²/s often delivers diminishing returns and can stress plants.
Bar spacing and mounting height
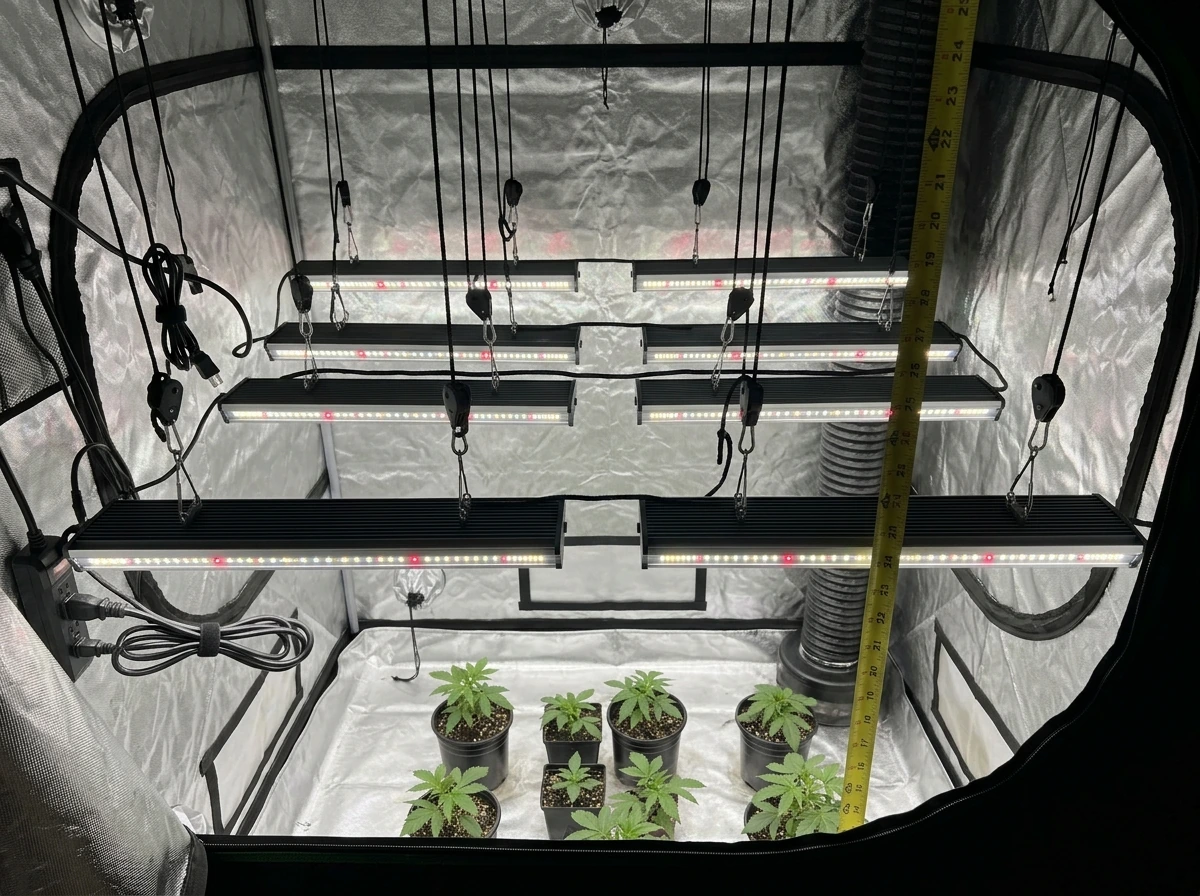
A documented commercial cannabis flowering layout specifies a mounting height of 24 inches above the canopy with bar center spacing of 16 inches. That spacing is designed to ensure the footprints from adjacent bars overlap enough to eliminate low-PPFD gaps between bars. Hanging bars too close to the canopy (under 12 inches) without proper optics creates hot stripes directly under each bar and PPFD troughs between them. If your bars don't have lenses or diffusion optics, you need more height to get the beam spread that produces uniformity. If they do have optics, you can often mount lower and tighter.
Tent size coverage guide
| Tent Size | Target PPFD (Flower) | Approx. Wattage Needed | Bar Configuration |
|---|---|---|---|
| 2x2 (4 sq ft) | 600–900 µmol/m²/s | 100–150W | 2–3 small bars or 1 multi-bar fixture |
| 2x4 (8 sq ft) | 600–900 µmol/m²/s | 200–300W | 2–4 bars mapped at 18–24 in height |
| 3x3 (9 sq ft) | 600–900 µmol/m²/s | 250–350W | 3–4 bars or 1 multi-bar fixture |
| 4x4 (16 sq ft) | 600–900 µmol/m²/s | 400–600W | 4–6 bars or dedicated 4x4 bar fixture |
| 5x5 (25 sq ft) | 600–900 µmol/m²/s | 600–800W | 6–8 bars or two overlapping fixtures |
| 4x8 (32 sq ft) | 800–1,000 µmol/m²/s | 800–1,200W | Multi-bar array, verify PAR map overlap |
These are starting points, not absolutes. Always get the manufacturer's PAR map for the exact configuration you plan to run and verify the numbers match your target PPFD at your intended hanging height. Two bars mapped over a 20 by 44 inch shelf, for example, will have very different overlap characteristics than a single fixture over the same area. If you can, do your own spot measurements with a PAR meter at canopy level after installation.
Best bar LED grow lights by scenario
These picks reflect current performance data, real-world testing results, and value relative to price. This isn't a sponsored list. I'm steering you toward fixtures with documented PPFD maps, credible efficacy numbers, and proper safety certifications.
Best overall: Mars Hydro FC-E4800
The FC-E4800 covers a 4x4 footprint and is built around BridgeLux diodes with a claimed efficacy of 2.8 µmol/J. Independent testing found a maximum canopy PPFD around 920 µmol/m²/s across the map, which is solid for a 4x4 flowering run without CO2. The adjustable bar design allows for even spread across the canopy, and the daisy-chain dimming function makes it practical to run multiple units from a single controller. It's not a cheap light, but for a 4x4 flower tent, it delivers documented performance rather than just marketing numbers. The one caveat: verify the PAR map at your actual hanging height, because at 24 inches you'll be at the lower end of that 700 to 920 µmol/m²/s range.
Highest output for commercial or CO2-supplemented grows: Grow Light Science PROGROW 2400
If you're running a commercial room or a CO2-supplemented flower space and need to push 1,200 to 1,500 µmol/m²/s at canopy, the PROGROW 2400 is one of the few bar fixtures with independently documented numbers to back up those claims. It outputs 2,424 µmol/s PPF and delivers around 1,500 µmol/m²/s PPFD in an array at an 18-inch mounting height. It carries ETL certification to UL 8800, which matters for commercial compliance and insurance purposes, and comes with a 5-year warranty. It's plug-and-play for array use, and up to 50 units can be controlled via the PROGROW lighting controller. This isn't a beginner light or a budget option, but if you need top-end output with certified safety documentation, this is the bar to benchmark against.
Best for efficiency-focused grows: Spider Farmer SE-series
The Spider Farmer SE-series, particularly the SE4500, posts PPE figures around 2.9 µmol/J on the product page, which puts it at the top of the efficiency range for production bar fixtures. The daisy-chain dimming system works well for multi-tent operations, and the full-spectrum output handles both veg and flower stages without switching modes. Spider Farmer positions these for tent coverage in the 4x4 range depending on model, and the PPFD data at standard hanging heights is consistent with the efficacy numbers. If electricity cost is a significant factor in your operation's economics, the SE-series efficiency advantage compounds meaningfully over multiple grow cycles.
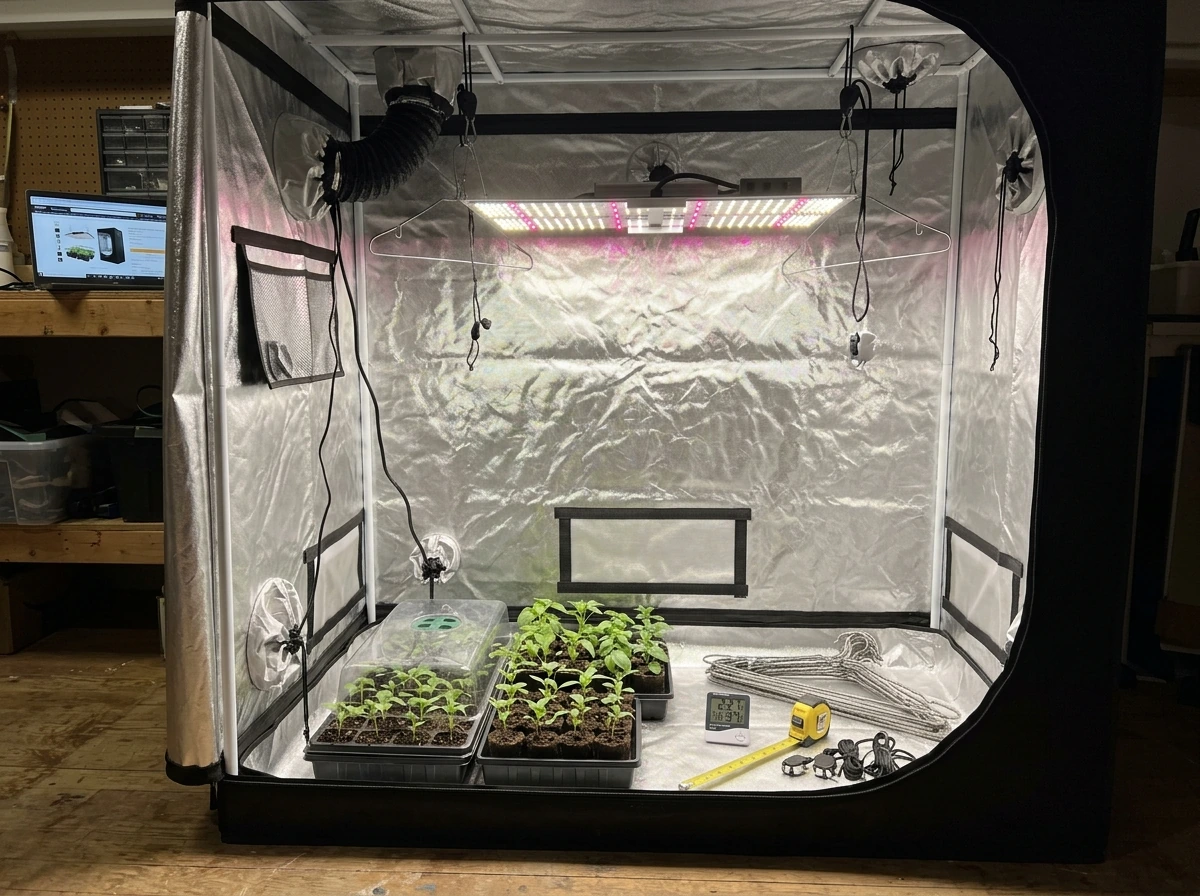
Best for small tents (2x2 to 2x4): lower-wattage bar strips
For a 2x2 or 2x4 setup, you don't need a 400W commercial fixture. Two to three lower-wattage bars (50 to 75W each) hung at 18 to 24 inches and spaced evenly across the tent width will give you the coverage and uniformity you need. Look for bars with a published PAR map showing 400 to 600 µmol/m²/s at 18 to 24 inches for veg or 600 to 800 µmol/m²/s for flower across the full footprint. At this scale, the key spec is uniformity across the short dimension of the tent, not peak center PPFD. HydroFarm published a PPFD map example covering exactly a two-bar layout over a 20 by 44 inch canopy, and that kind of documentation is exactly what you should ask for from any small-bar supplier.
Best budget pick for hobby growers
Budget bar lights have improved significantly. You can find multi-bar fixtures with 2.5 to 2.7 µmol/J efficacy from several Chinese manufacturers at competitive price points. The honest tradeoff is driver quality and longevity. Budget lights often use lower-grade drivers that degrade faster, and the PPFD maps are sometimes taken at unrealistically close hanging heights to inflate the numbers. If you go budget, look for: a PPFD map at a realistic 18 to 24 inch hanging height, at least a basic ETL or UL listing, and a minimum 3-year warranty. If you can't find those three things on a budget bar's product page, that's your signal to spend a bit more. For hobby growers running one or two plants through a full cycle, a well-documented mid-tier fixture will outlast and outperform a cheap option within the first two grow cycles.
Installation: mounting, wiring, daisy-chaining, and safety
Mounting options
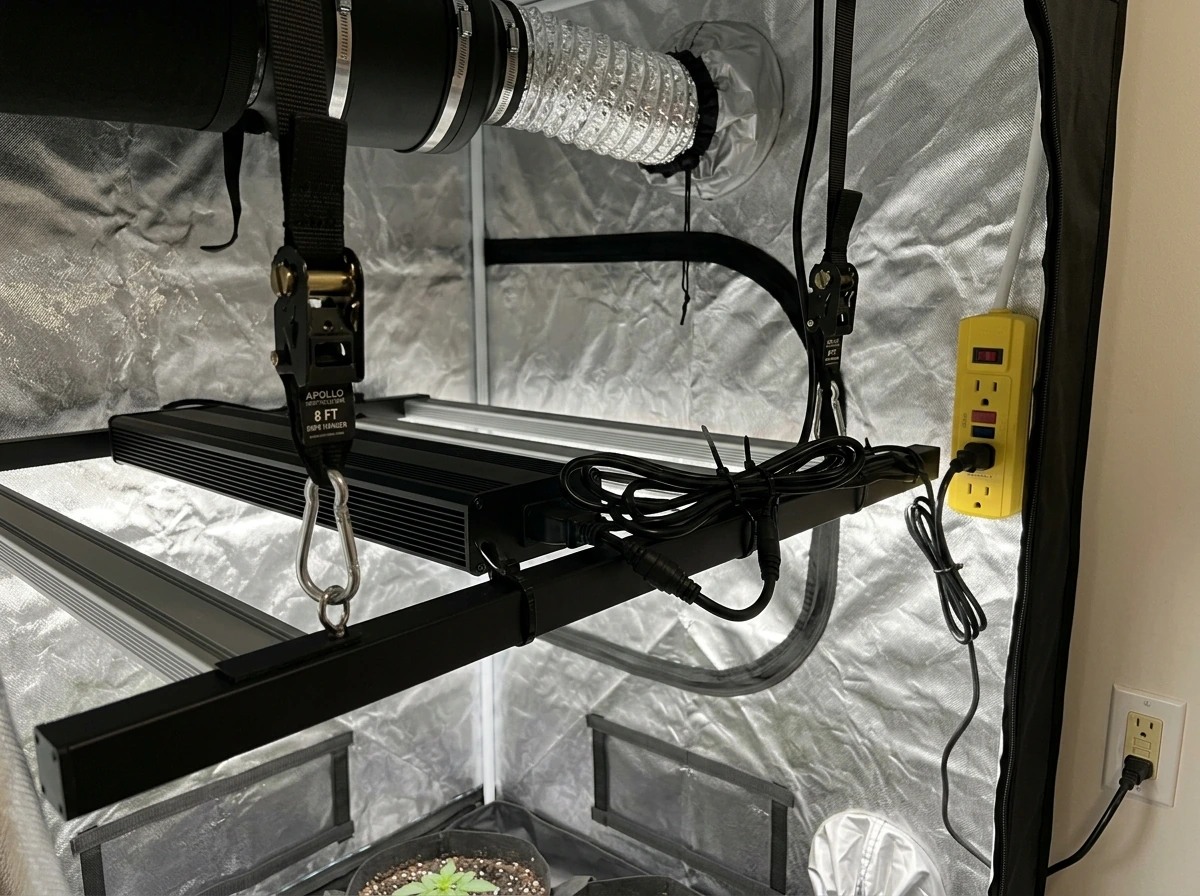
Most bar fixtures come with adjustable rope hangers or mounting brackets. In a tent, ratchet straps or rope ratchets give you the easiest height adjustment as plants grow. In a room or rack setup, fixed mounting rails or unistrut work well for commercial arrays. The key is being able to adjust height incrementally: start higher during early veg (24 to 30 inches) and lower during peak flower (18 to 24 inches for most bars) based on actual canopy PPFD readings, not just the manufacturer's default recommendation.
Wiring and daisy-chaining
Most modern bar fixtures support daisy-chaining, meaning you can run the signal or dimming control from one unit to the next in a line, reducing the number of separate control connections you need. For power, always check the total amperage draw of your daisy-chain run against your circuit's rating. A standard 15-amp 120V circuit can handle about 1,440W safely (at 80 percent load). If you're running 800W or more in a single tent, wire your lights to a dedicated 20-amp circuit. Never use extension cords as permanent wiring for high-wattage bar arrays.
GFCI and safety in wet environments
Grow spaces combine water, nutrients, and electricity in ways that create real shock hazards. GFCI (Ground Fault Circuit Interrupter) protection is mandatory for any grow space with irrigation or high humidity. GFCI outlets or breakers cut power within milliseconds if they detect a ground fault, preventing electrical shock. Pair GFCI protection with a UL 8800-certified fixture, and you've covered the two most important electrical safety bases in a grow room. For truly wet environments, look for IP65 or IP66-rated bar fixtures.
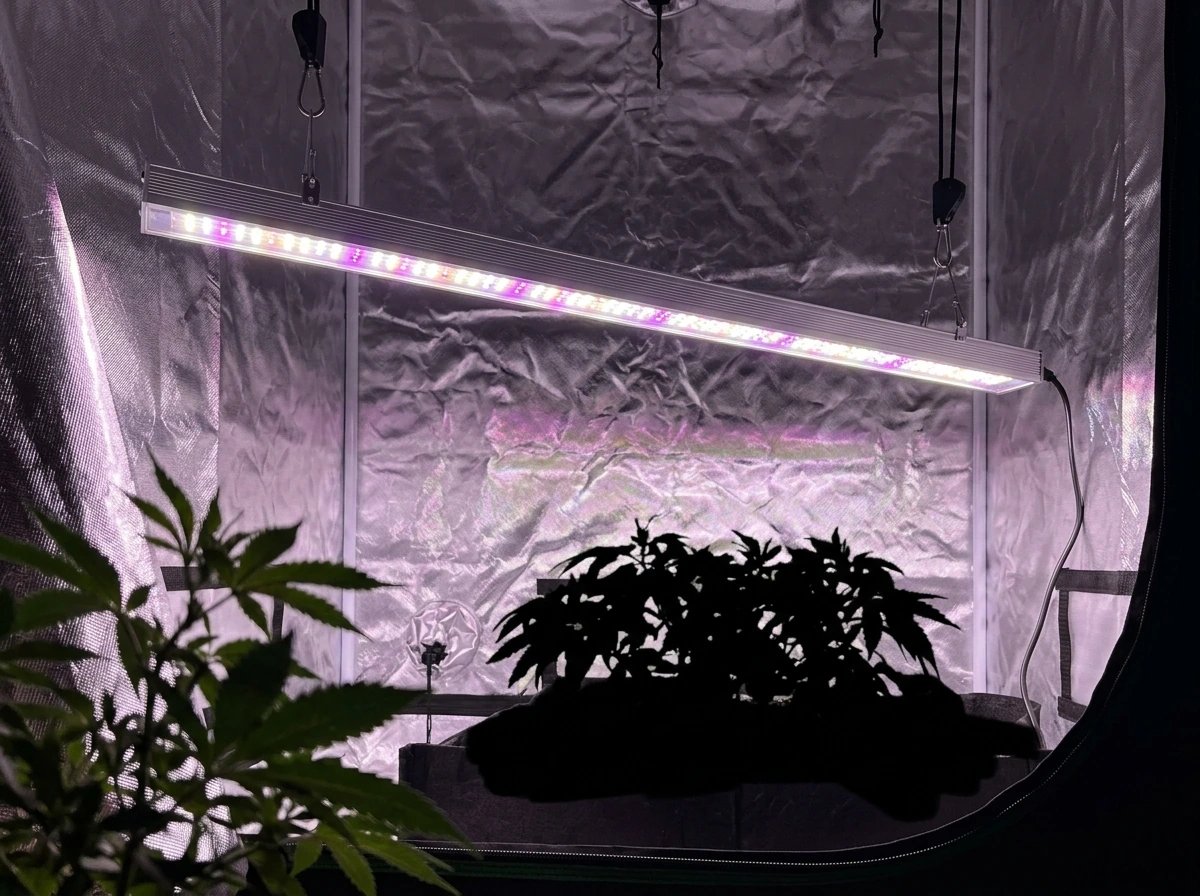
Side lighting with bars
Bar lights are uniquely well-suited for side lighting in vertical systems. Mounted vertically on the sides of a rack or shelf, they supplement the lower canopy layers that overhead lights can't penetrate deeply. For side lighting, mount bars at canopy height on each tier, aimed horizontally at the plants rather than downward. Use lower PPFD settings on side lights (200 to 400 µmol/m²/s contribution) to avoid light burn on the upper portion of the plant while boosting lower bud sites.
Common mistakes and tradeoffs with bar grow lights
- Trusting peak PPFD claims without checking the map height: A light showing 1,500 µmol/m²/s measured at 6 inches is useless information for a canopy at 24 inches. Always match the map height to your real hanging height.
- Underestimating the hot-stripe problem: Bars hung too close to the canopy without optics create high-PPFD stripes directly below each bar and low-PPFD troughs between them. Increase mounting height or choose fixtures with diffusion optics to even this out.
- Running too many bars on a single circuit without checking amperage: Calculate total wattage, divide by voltage, and stay at or below 80 percent of the circuit's rated amperage.
- Ignoring driver lifespan: LED diodes can last 50,000+ hours, but a cheap driver may fail at 15,000 to 20,000 hours. A fixture is only as good as its driver. Check warranty terms specifically, not just 'LED lifetime' claims.
- Skipping the PAR meter verification step: Manufacturer maps are measured in ideal conditions. Your tent walls, plant canopy density, and actual hanging height all affect real PPFD. Do at least a spot-check with a PAR meter after installation.
- Buying a bar designed for one footprint and using it for another: A bar mapped for a 4x4 footprint doesn't cover a 4x8 evenly. Match the fixture's documented coverage to your actual grow space.
- Assuming more bars always means more yield: Excess PPFD without CO2 supplementation doesn't translate to more yield above roughly 1,000 µmol/m²/s. You can overshoot on intensity and spend more on electricity than the yield gain justifies.
Your quick buying checklist and next steps
Use this checklist to move from browsing to buying with confidence. Every item on this list corresponds to a real performance or safety variable, not a marketing preference.
- Define your grow space footprint in square feet and your target PPFD for the growth stage you're optimizing for (veg: 400–600, flower: 600–900, high-light/CO2: 900–1,500 µmol/m²/s).
- Find the manufacturer's PAR map for the fixture you're considering and confirm it was measured at 18 to 24 inches above the canopy, matching your planned hanging height.
- Check the efficacy rating: aim for 2.7 µmol/J or above for a modern fixture. Below 2.5 µmol/J means higher electricity costs over the life of the fixture.
- Verify safety certification: look for ETL or UL listing, ideally with explicit UL 8800 compliance for horticultural use. If the product page doesn't mention it, contact the manufacturer and ask directly.
- Confirm dimming capability and daisy-chain support if you plan to run multiple bars.
- Check IP rating if your environment has high humidity or direct water exposure: IP65 minimum, IP66 for wetter setups.
- Review the warranty terms specifically for the driver, not just the LED diodes. A 5-year warranty with driver coverage is the benchmark for serious fixtures.
- Plan your electrical circuit: calculate total wattage for your planned bar array, confirm your circuit can handle it at 80 percent load, and install GFCI protection if not already present.
- After installation, do a real PPFD spot-check at canopy height with a PAR meter and adjust hanging height or dimmer level until you hit your target PPFD range.
- Compare your shortlist fixtures side by side on the specs above before buying. If one fixture doesn't have publicly available PAR maps, documented efficacy, and safety certification, move to the next option.
[top led grow lights 2020](/top-led-grow-lights/top-led-grow-lights-2020) represent the best current form factor for most indoor grows, from small hobby tents to commercial racks. The technology has matured to the point where mid-tier fixtures genuinely compete with premium ones on efficiency, and the gap between budget and quality has narrowed. What hasn't changed is that the right fixture for your setup is still defined by measurable numbers: PPFD at your hanging height, efficacy, and coverage footprint match. Nail those three things and you'll get solid, consistent results regardless of which brand name is on the bar.
FAQ
Can I buy the best bar LED grow lights based on total watts alone?
Yes, but only if you can map it to your exact hanging height and spacing. Check for a PAR map that matches your planned distance, then confirm overlap uniformity, not just peak center readings. If the product only lists a maximum PPFD figure without a grid map, treat it as a marketing estimate and budget for extra bars to close low-PPFD gaps.
How do I prevent hot spots directly under each bar?
To avoid hot stripes, verify whether the bar uses optics or diffusion. Bar fixtures with lenses can usually be mounted closer while keeping side-to-side spread flatter, while optics-free designs often need more height and sometimes tighter bar spacing to reduce under-bar peaks and between-bar troughs.
Is it okay to run bars at partial power, or should I switch stages instead?
You should generally dim by reducing intensity with the driver (dimming channel) rather than turning bars fully off or lowering power by disconnecting sections. Full power cycling or running only part of an array can change spectrum balance and coverage, which can lead to uneven canopy development even if the total light seems “similar.”
When daisy-chaining bar lights, do I also need to worry about power limits?
Daisy-chaining usually covers the control signal or dimming, but you must still total the electrical load. Add the actual watt draw of every connected bar (not the marketing “equivalent”) and confirm it stays within your circuit and controller specifications, including any maximum units per run.
How can I verify the PPFD claims after I mount the bars?
A good PAR map lets you choose hanging height, but it is not a substitute for uniformity checks after installation. If you do not own a PAR meter, you can still validate using multiple measurement points through the canopy plane (center and several edges). If you see large differences, adjust height in small increments and reassess.
Why does a PAR map not match my tent size?
Watch for the “map height” and “array configuration” assumptions. Some PAR maps are taken over a specific shelf size, with a specific number of bars and spacing. If your tent is a different width or you use a different spacing, the overlap changes, and the stated µmol/m²/s may not reproduce.
What happens if I mount the bars higher than the recommended height?
If the PAR map is taken at 18 to 24 inches, then raising the fixture can quickly reduce center PPFD by a meaningful margin, but the bigger risk is losing uniformity overlap across the footprint. If you plan to mount higher than the map height, you likely need more bars or a different mounting layout to hit your target across the full area.
How should I aim bar lights when I’m using side lighting in a vertical rack?
For side lighting, mount bars at tier height and aim horizontally. A practical mistake is leaving side bars at an overhead angle or too high above the canopy, which sends most light past the plants and forces you to crank intensity to compensate, increasing burn risk on the upper leaves.
What safety details matter most when choosing a bar light for a grow room?
Use safety markings as a decision gate. If you are in the US, prioritize fixtures that are explicitly listed for horticultural use under UL 8800 or carry an equivalent ETL listing that states compliance with that standard. For humid rooms, also confirm an appropriate IP rating for the fixture enclosure, because “water resistant” is not the same as wet-rated.
Do I need separate veg and bloom switches on a bar light?
Not necessarily. Veg stage targets can be met with lower PPFD settings and dimming, but you should still ensure the spectrum is suitable for vegetative growth. If your bar has separate veg and bloom channels, it can help control red intensity, but a fixed full spectrum with dimming is often simpler and adequate for single-tent grows.
How do I judge driver quality and expected lifespan for budget bar fixtures?
Look at warranty length and driver/controller documentation as “longevity signals.” Budget bars can be fine for one or two cycles, but a short warranty or unclear driver brand is a warning. Also check whether the fixture supports replacement of the driver if it fails, since drivers are the component most likely to need service.
If I want maximum yields, can I push PPFD as high as possible?
Yes, but use a conservative approach. In peak flower without CO2, pushing beyond about 1,000 µmol/m²/s often gives diminishing returns and can increase stress, especially if temperature, humidity, and airflow are not tuned. If you target 1,200 to 1,500, plan on CO2 and verify leaf temperature and VPD, not just light numbers.
Next Articles

Best American Made LED Grow Lights: USA Selection Guide
USA-made LED grow lights guide with how to verify claims, compare PPF and coverage, and pick best options for your space
Where to Buy LED Grow Lights: Best Places and How to Choose
Find the best places to buy LED grow lights near you and a checklist to choose the right spectrum, coverage, and wattage
Best LED Grow Bulb: How to Choose the Right One
Choose the best LED grow bulb by coverage, PAR, spectrum, wattage, fit, and safety for your plants and space.