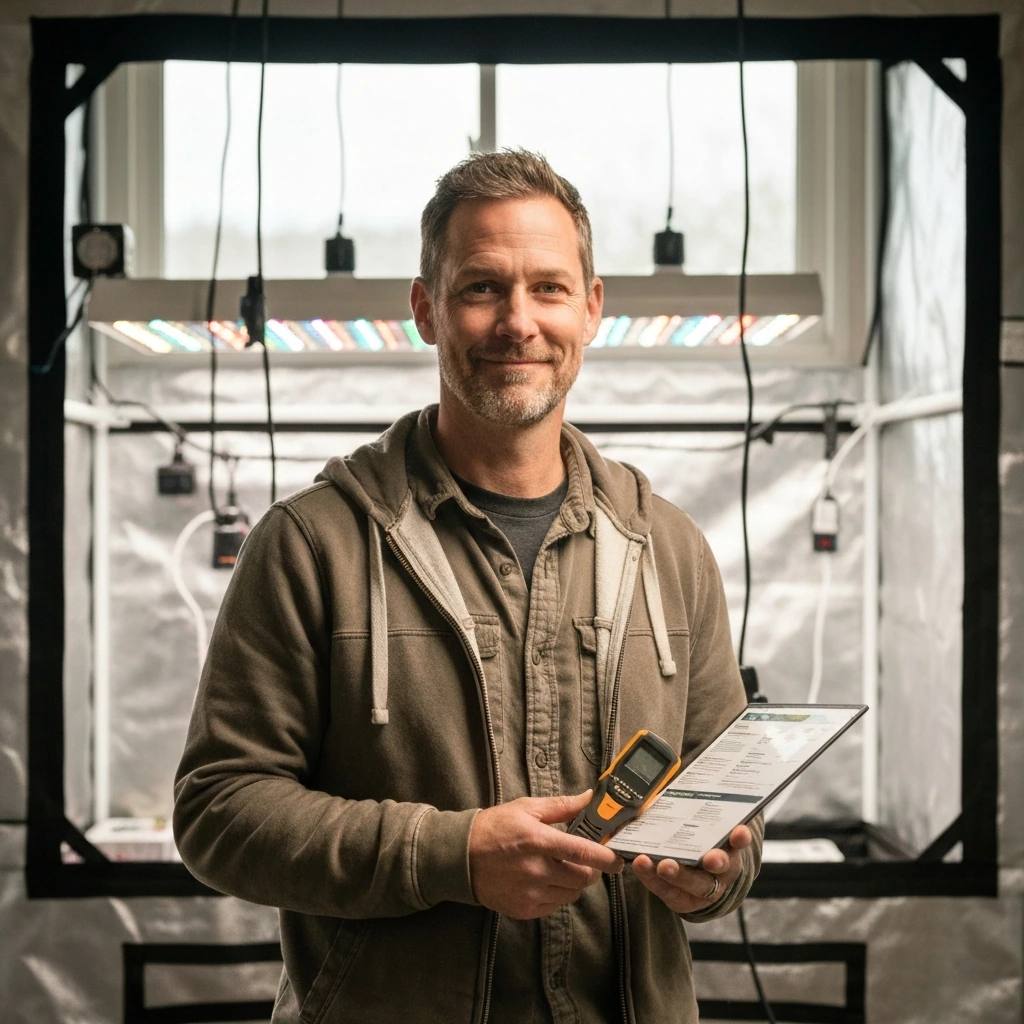
The best LED grow light for your setup is the one that delivers the right PPFD across your actual canopy footprint, runs efficiently enough to keep heat and electricity costs manageable, and comes from a brand that backs it with real test data and a solid warranty. That sounds obvious, but most buyers get tripped up chasing wattage numbers or falling for marketing PPFD charts measured at a single center point. This guide cuts through that and gives you specific picks, real sizing math, and a clear checklist so you can make a confident decision today.
Top LED Grow Lights: How to Choose Best Models for Your Setup
Marcus Rutherford
24 Mar 2026
What 'best' actually means for LED grow lights
Before comparing any models, you need to agree on what 'best' means, because it shifts depending on your situation. A 2x2 tent for seedlings has completely different requirements than a 4x4 flowering tent or a 5x5 commercial-style setup. There are four things that matter most: coverage (does the light hit your canopy footprint uniformly?), efficiency (how many micromoles of light do you get per watt of electricity?), spectrum (is it appropriate for your crop and stage?), and verified output (is the PPFD data backed by real LM-79 testing or just a marketing graphic?).
Efficiency is measured in µmol/J (micromoles per joule). Anything below 2.0 µmol/J is outdated by 2026 standards. The better mid-range fixtures hit 2.5–2.8 µmol/J, and top-tier commercial bars push past 3.0 µmol/J. HLG's Universal Supplement Light, for example, states a photon efficacy of 3.07 µmol/J. That number matters because higher efficiency means less heat dumped into your grow space and a lower electricity bill over a full season.
The other thing 'best' depends on is budget bracket. A Spider Farmer SF-4000 at around $350–400 and an HLG Diablo at $700+ both get strong reviews, but they serve different growers. Knowing which bracket you're in before you start shopping saves a lot of time.
How to size an LED grow light for your space
Coverage is the spec that most manufacturers abuse. They'll show a PPFD map taken at a single center point 18 inches above the fixture, in a white-walled environment, and call that 'coverage.' Real coverage means uniform, usable PPFD across the entire canopy footprint, not just the hot spot in the middle.
The practical sizing rule starts with PPF (photosynthetic photon flux, measured in µmol/s), which is the total light the fixture emits. A rough but useful benchmark from grow light research is that roughly 1,000 µmol/s of PPF can cover about 1.4 to 2.0 square meters at flowering-level intensity, depending on how reflective your tent walls are and how efficiently the fixture distributes light. That translates to roughly a 4x4 foot footprint (about 1.5 m²) being well-served by a fixture in the 800–1,200 µmol/s PPF range.
| Tent Size | Canopy Area | Target PPF Range | Approximate True Wattage |
|---|---|---|---|
| 2x2 ft | 0.37 m² | 200–350 µmol/s | 80–150W |
| 3x3 ft | 0.84 m² | 450–700 µmol/s | 200–300W |
| 4x4 ft | 1.49 m² | 800–1,200 µmol/s | 350–600W |
| 5x5 ft | 2.32 m² | 1,200–1,800 µmol/s | 550–900W |
| 4x8 ft | 2.97 m² | 1,600–2,400 µmol/s | 700–1,200W |
Mounting height changes everything. Raising a fixture spreads light over a wider area but drops intensity at the canopy. Lowering it concentrates intensity but creates hot spots and reduces uniformity. A practical approach is to raise or lower the light until the maximum PPFD reading in your test area lands between 950 and 1,000 µmol/m²/s, which gives you a consistent starting point for comparing how well any fixture covers your footprint. From there, uniformity matters: a minimum-to-average uniformity ratio above 0.6:1 across your canopy is the target to aim for. Anything worse than that means some plants are getting significantly less light than others.
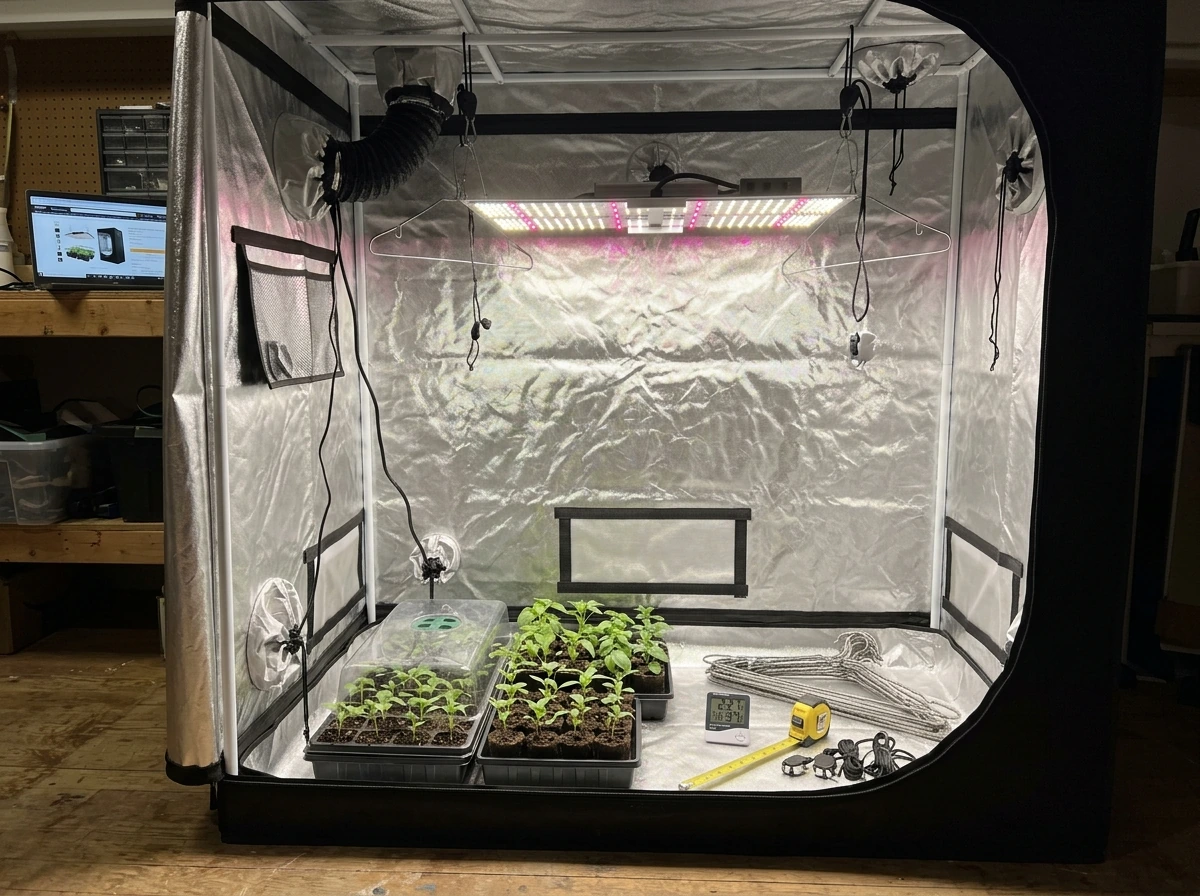
General mounting height starting points for most quantum board and bar-style fixtures: 18–24 inches above canopy for seedlings and early veg, 12–18 inches for late veg, and 10–16 inches for flowering (assuming the fixture is dimmable and you're not driving it at 100%). Always verify with a PAR meter rather than trusting the spec sheet alone.
Full-spectrum vs stage-specific lighting: what actually matters
Full-spectrum LEDs (sometimes called 'white light' or 'broad spectrum') cover the entire PAR range of 400–700 nm and often extend into UV (below 400 nm) and far-red (700–800 nm). The vast majority of growers doing photoperiod crops, cannabis, tomatoes, or herbs in tents should use full-spectrum fixtures. They're simpler to manage, work across all growth stages, and modern phosphor-converted LEDs deliver excellent results without the complexity of running separate veg and bloom fixtures.
Stage-specific or 'supplemental' lighting makes more sense in two scenarios: large commercial grows where you're running dedicated veg and flower rooms and can optimize each independently, or when you're adding UV or far-red supplementation on top of a main full-spectrum fixture to push specific responses (like the Emerson effect from far-red, which can accelerate flowering transitions). For most home growers and small commercial setups, a quality full-spectrum LED with dimming covers everything without the overhead.
The spectrum trap to avoid is buying a fixture with a heavy blue or purple LED array marketed as 'veg-optimized.' Those older-style blurple lights have poor efficacy and uneven canopy penetration compared to modern white-based full-spectrum boards. If a fixture doesn't list a phosphor-converted LED or doesn't show a spectral distribution graph from real testing, skip it.
Top LED grow light picks by space, wattage, and budget
In top LED grow light picks by space, wattage, and budget
Small spaces (2x2 to 3x3): best budget and mid-range picks
- Mars Hydro FC-E1000 (100W, ~$90): A strong entry-level bar-style fixture for a 2x2 tent. Efficiency lands around 2.6 µmol/J, 0–10V dimming, and real-world PPFD performance holds up to the spec sheet better than most budget fixtures at this price.
- Spider Farmer SE3000 (300W, ~$200): A capable quantum board for a 3x3. Spider Farmer's LM-79 data is publicly available, efficiency is around 2.7 µmol/J, and the build quality punches above its price. Good choice if you're not ready to spend HLG money.
- HLG 200 Rspec (200W, ~$350): The premium pick for a 3x3. Samsung LM301H diodes, 2.8+ µmol/J efficacy, 5-year warranty, and HLG's customer support is genuinely good. Worth the premium if you plan to run this light for multiple seasons.
4x4 tents: the most competitive category
- Spider Farmer SF-4000 (450W, ~$370): One of the most popular fixtures in this category for good reason. Up to 5-year warranty, 0–10V dimming, and around 2.7 µmol/J verified efficiency. Good coverage uniformity in a 4x4, with daisy-chain support for scaling. Solid value pick.
- Mars Hydro TS 3000 (450W, ~$320): Competes directly with the SF-4000. Slightly warmer spectrum tone, dimmable driver, and performs well in 4x4 tent configurations. A bit less flexible on control options than the SF-4000 but costs less.
- HLG 600 Rspec (480W, ~$650): The premium 4x4 option. Samsung diodes, real-world 2.8–2.9 µmol/J, excellent build quality, and HLG backs it with their full warranty. If you want the best light you won't need to replace for 5+ years, this is it.
- Gavita Pro 1700e LED (645W, ~$900): Aimed at serious hobbyists and small commercial growers. Built for 4x4 to 5x5 coverage, Gavita's commercial pedigree shows in build and consistency. Overkill for most home growers but worth it if you're running multiple cycles per year.
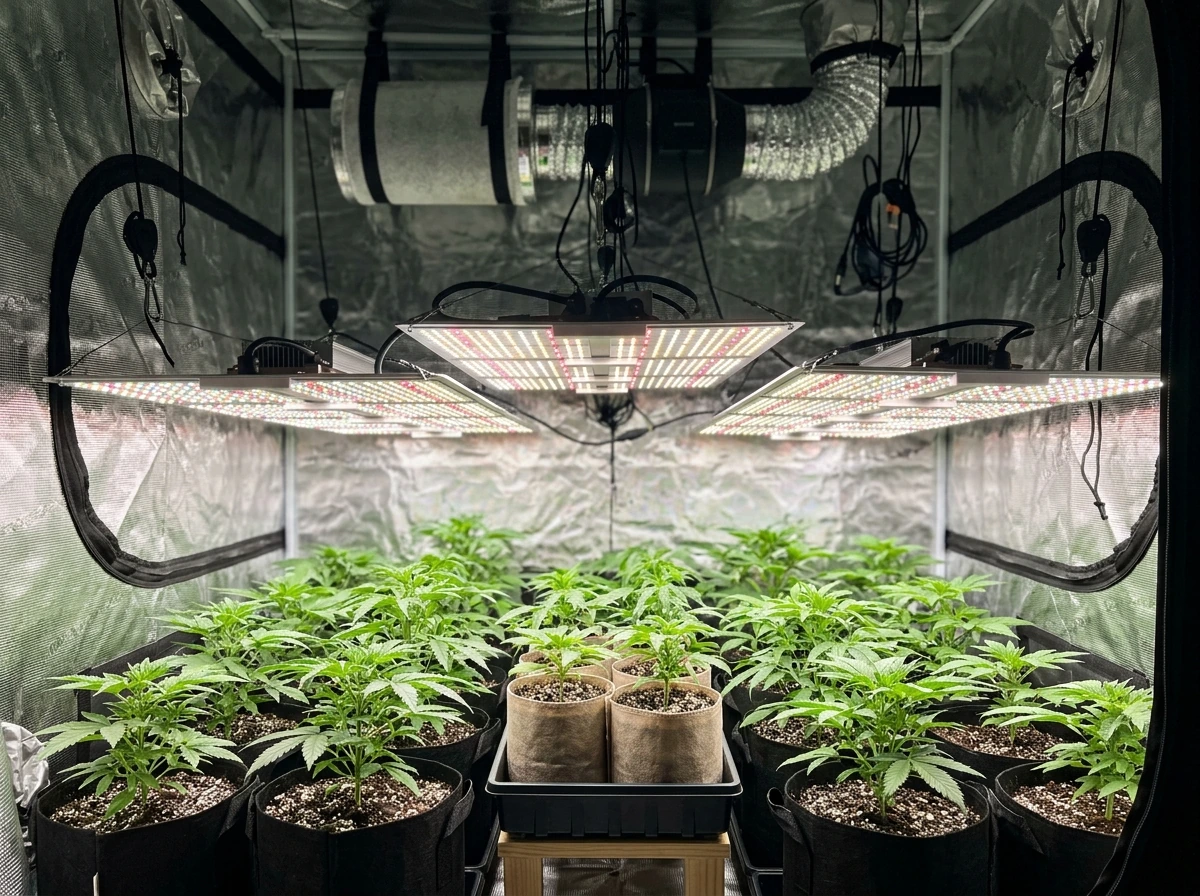
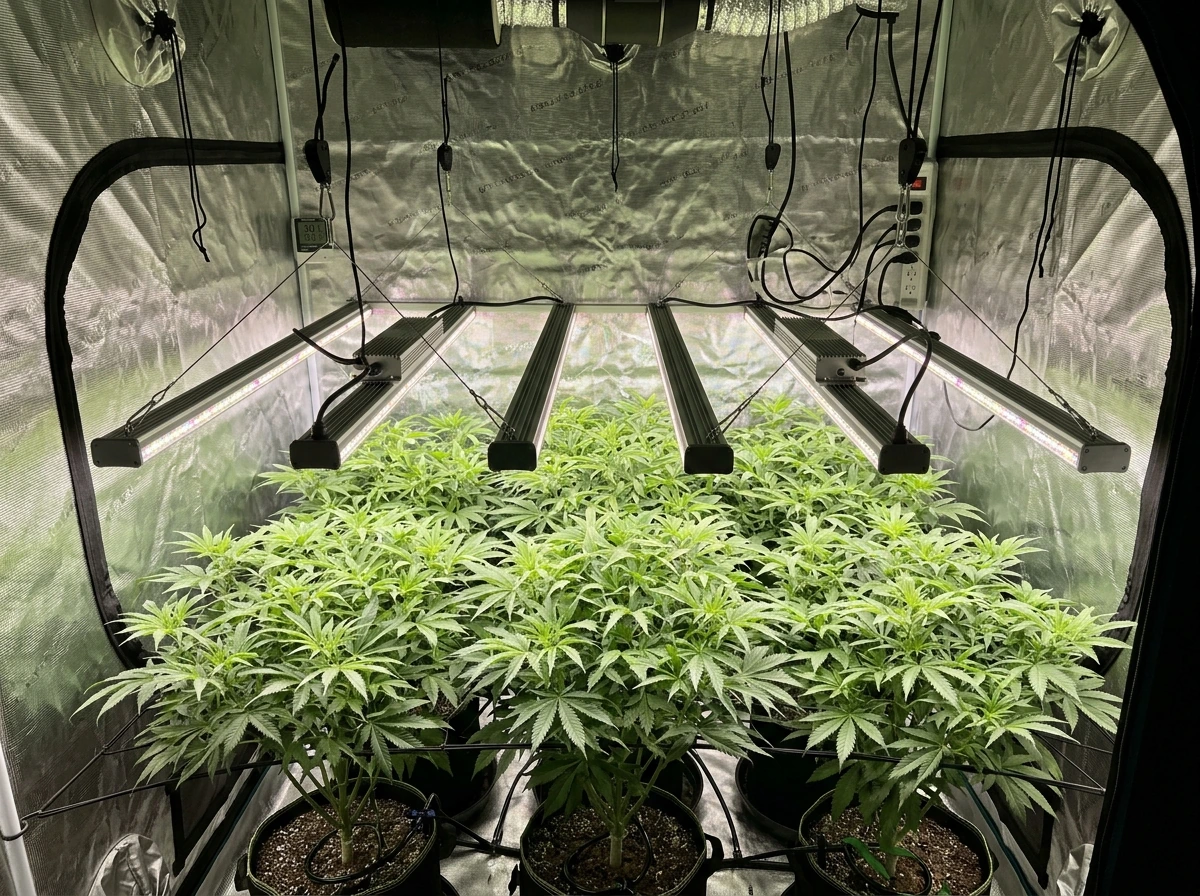
5x5 and larger: bar lights take over
- HLG Scorpion Diablo (650W, ~$850): One of the best fixtures you can buy for a 5x5. Bar-style layout delivers far better uniformity than a single quantum board at this footprint. 3.0+ µmol/J efficacy, 0–10V dimming, and HLG's warranty.
- Spider Farmer G8600 (860W, ~$700): A strong value in the large-tent bar category. Eight-bar layout, covers a 5x5 to 5x8 depending on crop targets, and Spider Farmer's improved driver quality in this generation is noticeable.
- Fluence SPYDR 2p (645W, commercial pricing): The standard for commercial operators. IP66-rated, designed for multi-light arrays, and Fluence publishes detailed photometric data for their fixtures. Worth requesting a quote if you're outfitting more than 2–3 lights.
Quick comparison: top 4x4 picks side by side
| Fixture | True Watts | Efficacy (µmol/J) | Dimming | Warranty | Price (approx.) |
|---|---|---|---|---|---|
| Mars Hydro TS 3000 | 450W | ~2.6 | Yes (knob/driver) | 3 year | ~$320 |
| Spider Farmer SF-4000 | 450W | ~2.7 | 0–10V | Up to 5 year | ~$370 |
| HLG 600 Rspec | 480W | ~2.8–2.9 | 0–10V | 5 year | ~$650 |
| Gavita Pro 1700e LED | 645W | ~2.6 | 0–10V / controller | 5 year | ~$900 |
Efficiency, heat, dimming, and build quality: what to check before you buy

Efficiency (µmol/J) is the single most important number to verify before buying. LM-79 is the standardized measurement method for LED luminaires and is required by programs like the DesignLights Consortium (DLC) for horticultural qualification. If a manufacturer can't point you to LM-79 test data, treat their efficacy claim with serious skepticism. DLC-listed fixtures are a reliable shortcut: DLC qualification requires LM-79-based efficacy measurement over the full PAR range (400–700 nm), so any fixture on the DLC horticulture list has had its numbers independently verified.
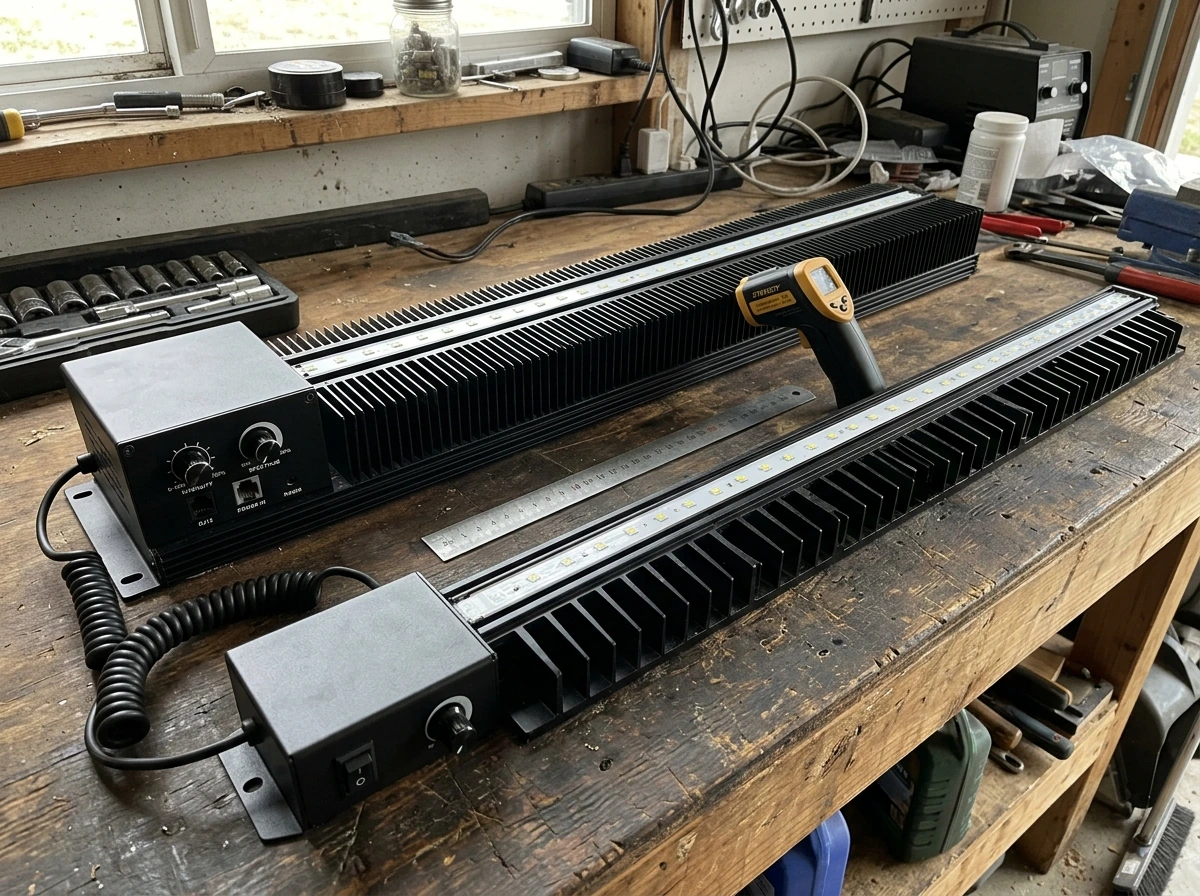
Heat management is where cheap fixtures fall apart over time. Better fixtures use passive heatsinks with good thermal design and run their diodes at lower current (which extends LED lifespan and keeps junction temperatures low). If a fixture gets too hot to comfortably touch the heatsink after 30 minutes at full power, that's a warning sign for top shelf led grow lights. Good bar-style lights spread heat across a larger surface area than compact board designs, which is part of why bars dominate at 600W+ in professional settings.
Dimming matters more than most new growers expect. You'll want to run seedlings at 30–50% power, ramp up through veg, and hit 80–100% in peak flower. A fixture with 0–10V dimming can integrate with environmental controllers, letting you automate ramp-ups or compensate for ambient temperature changes. Fixtures with only a physical knob dimmer work fine for manual control but limit automation. Check whether daisy-chain capability is supported if you plan to run multiple lights: HLG's Greenhouse Pro FS supports daisy-chaining on the AC side, and HLG's Universal Supplement Light allows connecting up to 6 fixtures together, which is a major convenience in a commercial-style layout.
Build quality red flags to watch for: exposed driver boards with no IP rating in humid environments, thin aluminum heatsink fins that bend easily, proprietary connectors with no replacement parts available, and warranties shorter than 3 years. The best fixtures in this price range carry 5-year warranties (Spider Farmer SF-4000, HLG lineup), which tells you something about how confident the manufacturer is in their thermal and electrical design.
Installation, setup, and dialing in PPFD for your grow stage
Once you have the fixture, the job is matching PPFD at the canopy to what your plants actually need at each stage. The formula connecting PPFD to daily light integral (DLI) is: DLI (mol/m²/day) = 0.0036 × PPFD (µmol/m²/s) × hours of light per day. This lets you translate stage-based targets into real dimmer settings.
| Growth Stage | Target PPFD (µmol/m²/s) | Photoperiod (hrs) | Resulting DLI (mol/m²/day) |
|---|---|---|---|
| Seedling | 150–300 | 18 | 9.7–19.4 |
| Early veg | 400–600 | 18 | 25.9–38.9 |
| Late veg | 600–800 | 18 | 38.9–51.8 |
| Early flower | 800–1,000 | 12 | 34.6–43.2 |
| Peak flower | 900–1,100 | 12 | 38.9–47.5 |
Cannabis-specific targets from horticultural research put seedlings and veg comfortably in the 400–600 µmol/m²/s range with DLI around 26–39 mol/m²/day, and mid-to-late flower at 800–1,000 µmol/m²/s with DLI targeting 35–43 mol/m²/day. These aren't absolute limits, but they're solid practical benchmarks.
To dial in mounting height properly, use a PAR meter (or borrow one) and take readings at a 3x3 or 5-point grid across your canopy. Adjust height until the maximum reading is between 950 and 1,000 µmol/m²/s, then note the average across all points. If the minimum reading is less than 60% of the average (below the 0.6:1 uniformity ratio target), you may need to raise the fixture slightly to spread light more evenly, even if it costs some peak intensity. Consistent coverage beats a bright center with dim corners.
For ongoing maintenance: wipe down fixture lenses and reflectors every 4–6 weeks (dust cuts PAR output meaningfully), check that all connections and hangers remain secure, and monitor your grow space temperature at canopy level. If ambient temps climb above 82°F (28°C) during lights-on, you're losing efficiency from both the plants and the fixture. Make sure your tent exhaust is sized appropriately for the fixture wattage you're running.
Common mistakes and quick troubleshooting after the light goes up
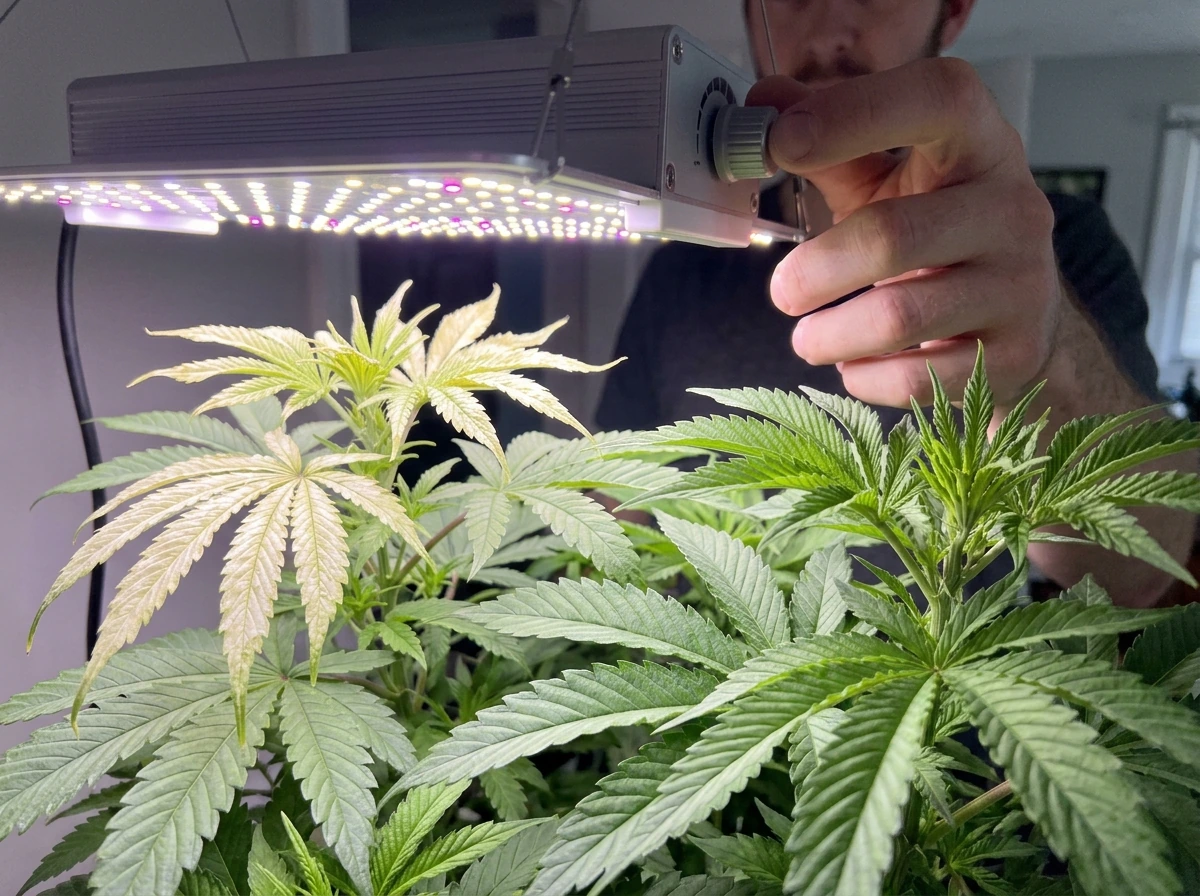
The most common mistake after installing a new LED is running it too close at full power on day one. Even if your fixture is rated for a 4x4 at full power, seedlings and young plants will show light stress (bleaching, cupping leaves, tacoing) if they're hit with 800+ µmol/m²/s immediately. Start at 40–50% power and raise intensity gradually over the first week.
- Light bleaching or white patches on upper leaves: fixture is too close or intensity is too high for the current growth stage. Raise the light 4–6 inches or dim down 20%.
- Stretchy, weak stems in seedlings under a new LED: the opposite problem. PPFD is too low, usually because the light is mounted too high or dimmed too much. Drop it 6 inches or increase to 60% power.
- Uneven growth across the canopy (some plants thriving, others lagging): poor uniformity. Take a PAR grid measurement and adjust mounting height or consider adding a second fixture for the footprint.
- Fixture running unusually hot (heatsink painful to touch): check airflow around the fixture, make sure nothing is blocking the heatsink fins, and verify you're not running it above its rated wattage via an external dimmer.
- PPFD readings much lower than the spec sheet shows: verify you're testing under similar conditions (white tent walls vs. open room make a large difference), check for dirty lenses, and confirm the fixture's driver hasn't been damaged in shipping.
- Photoperiod light leak causing hermaphroditism (cannabis): check all tent zippers, ports, and seams with lights out. LEDs have no warm-up delay, so even brief leaks during dark periods are problematic.
One broader point worth making: the fixtures available today from Spider Farmer, HLG, Mars Hydro, and Gavita are genuinely much better than what was on the market even four years ago. Efficiency numbers that were premium-only in 2022 are now standard on mid-range boards. If you're comparing current options to older guides or older models, the benchmarks have shifted significantly upward. The bar for 'good enough' is higher, which is actually great news for growers at every budget level.
FAQ
Do I really need LM-79 data to buy top LED grow lights, or is DLC enough?
If a brand cannot share LM-79 test documentation for efficacy over the relevant PAR range, assume the published efficiency and PPFD charts are marketing guesses. DLC qualification is a strong shortcut because it is based on independent LM-79 style measurements, but still double check that the fixture you are considering is specifically on the horticulture list, not just another DLC category.
How do I compare two top LED grow lights when one uses a higher wattage but lower stated µmol/J?
Use µmol/J to estimate how much electrical power turns into usable photons, then sanity-check heat and expected canopy PPFD with your mounting plan. If two fixtures produce similar canopy PPFD in your PAR grid, the one with higher µmol/J should run cooler and cost less over the season, which matters for both plant stress and electricity.
What if my fixture’s maximum PPFD test point hits 950 to 1,000 µmol/m²/s, but my corners are still dim?
That usually means your uniformity is limited by reflector geometry and mounting spread. Raise the light slightly to spread output, increase reflective properties in the tent (white surfaces or proper reflectors), and re-check with a multi-point PAR grid because a single center measurement will hide poor edge coverage.
Should I measure PPFD with the light at full power, or at the dimmer setting I plan to use?
Measure at the same dimmer output you intend to run for that stage. Drivers can behave differently across the dimming range, and some fixtures change distribution when dimmed. If you only test at 100% power, you may misestimate uniformity and PPFD after you dial the intensity down.
Can I use top LED grow lights at different heights without losing efficiency?
You can, but changing height affects both canopy intensity and uniformity. Higher mounting improves coverage uniformity but reduces peak PPFD at the canopy, meaning you may need more dimmer power. The key is to re-balance using PAR readings, then confirm you are not exceeding your stage’s target PPFD and DLI.
Is far-red or UV supplementation worth it for a home setup using a single full-spectrum light?
It can be beneficial if you have a specific goal and can control it, but it is not required for good yields. Far-red supplementation is most useful for targeted photoperiod responses, and UV is easiest to overdo. If you add it, introduce it gradually and verify plant response, since excess can increase stress and reduce consistency.
What’s a realistic way to avoid the spectrum trap with “veg-optimized” blurple or blue-heavy models?
Look for phosphor-converted white LED systems and a spectral distribution graph that covers the PAR range, not just marketing photos or a color description. Also check efficacy (µmol/J) and whether the fixture has real test output data. A “veg” marketing label is not the deciding factor, verified performance is.
Do I need a daisy-chain or controller integration, or is manual dimming fine?
Manual dimming is fine if you only run one light and can adjust routinely. Controller integration (like 0-10V dimming) becomes valuable when you want scheduled ramp-ups, automatic compensation for temperature swings, or synchronized dimming across multiple fixtures. If you plan multiple lights, check that the fixture supports daisy-chaining the way you intend, and confirm compatibility with your controller.
How hot is too hot for top LED grow lights, and how do I check it safely?
A practical red flag is if the heatsink becomes uncomfortably hot to touch after about 30 minutes at full power, because it suggests poor thermal design or high junction temperatures. Measure at steady state, and do not block vents. Also monitor canopy-level air temperature, because even an efficient fixture can contribute to heat load if your exhaust or tent airflow is undersized.
Are warranties shorter than 3 years always a dealbreaker?
Shorter warranties are a risk signal, but the larger issue is whether the warranty matches the fixture’s thermal and electrical design. If you are seeing quick discounting, limited parts availability, or no clear thermal specs, treat it as higher risk. For premium bar-style lights, longer warranties (often 5 years) usually indicate more confidence in driver reliability and heatsink performance.
How do I translate PPFD targets into a daily light integral when I change my photoperiod?
Use DLI = 0.0036 × PPFD × hours of light per day. If you extend photoperiod, you can reduce PPFD by dimming to keep DLI in the same range, which can help avoid light stress while maintaining total daily photon delivery. Re-check your DLI after any schedule change, especially during transitions.
What’s the right way to start with seedlings so I don’t shock them with top LED grow lights?
Start lower than full output, usually around 40 to 50% power, and ramp over the first week while watching for bleaching, cupping, and “taco” leaf shapes. Also confirm your mounting height is not set to a flowering target. If you are using a dimmer, make step changes and allow a full day for plant response before increasing intensity.
How often should I clean lenses or reflectors, and what happens if I skip it?
A practical cadence is every 4 to 6 weeks, because dust can noticeably reduce PAR output and flatten uniformity. If your tent environment is dusty or you run high airflow, shorten the interval. After cleaning, re-check at least one or two PAR points, since your previous dimmer settings may deliver more photons than before.
If my grow space is above 82°F during lights-on, should I change the light or fix ventilation first?
Fix ventilation first, because temperature affects both plant performance and fixture efficiency. However, if you must run temporarily, reduce intensity to protect plants and avoid compounding heat stress. After ventilation is corrected, re-calibrate PPFD with your PAR meter because any previous “settings” were working under a warmer, less efficient condition.
Next Articles
Best Bar LED Grow Lights: Buying Guide by Tent Size and PPFD
Pick the best bar LED grow lights by tent size and PPFD, with practical specs, sizing, and installation tips.

Best American Made LED Grow Lights: USA Selection Guide
USA-made LED grow lights guide with how to verify claims, compare PPF and coverage, and pick best options for your space
Where to Buy LED Grow Lights: Best Places and How to Choose
Find the best places to buy LED grow lights near you and a checklist to choose the right spectrum, coverage, and wattage